Tuesday, December 20, 2011

Hanukkah or Anytime Gluten Free Donuts

The gluten free version of Bisquick is dairy free as well---a nice plus in my opinion. I call these "drop donuts". You can add just about anything to them, such as grated apple or zucchini, or sliced bananas. They are easy to make and delicious to fresh and hot.

Gluten-Free Doughnut Holes


Gluten Free "Drop" Bisquick Donuts

2 cups gluten free Bisquick

3 Tablespoons sugar

1/2 cup rice, soy or dairy milk

1 teaspoon vanilla extract

1/2 teaspoon ground cinnamon

1 egg, beaten

Canola or vegetable oil for frying

1/2 cup seedless raspberry jam, optional

powdered sugar, optional

Cinnamon and sugar, optional


In a large mixing bowl, mix together first 6 ingredients. Add more milk, a tablespoon at a time, if mixture is very thick. Cover and refrigerate until oil heats.


Meanwhile, heat 3 inches of oil in a large pot on medium-high (375 degrees) heat. To test readiness of oil, drop a walnut size piece of dough into hot oil. If it floats and small bubbles appear around it, the dough is ready. Using two tablespoons, scoop up batter in one and push it off the spoon with the other into the oil. Don't crowd the pot. Fry only 2 or 3 donuts at a time. Using a slotted spoon, turn donuts when they appear golden. Fry for 3-4 minutes per side. Remove donuts to a paper towel lined plate and drain well. Repeat until all batter is used up.


Allow donuts to cool for 5 minutes. Using a pastry bag fitted with a round tip, fill donuts with jam. Place powdered sugar in sieve and sprinkle over donuts. These are also great not filled and sprinkled with cinamon and sugar, that's the way my kids like them.... Best served warm. Store tightly wrapped in plastic wrap.


Makes: 1 dozen small or 9 large donuts.

Tuesday, December 6, 2011

Let’s very quickly clear up any confusion you might have about persimmons. There are probably two types of persimmons that you might run in your search for the fruit this autumn. Fuyu persimmons are the squat little darlings that you can eat when they are hard, think apples. They are great in salads.  Hachiya persimmons are the more bulbous fruit that are best enjoyed super ripe and super soft. Hachiya persimmons are lovely for baking as they are super sweet… like eating nectar… I hear they are dreamy.


Now… I hear when you think of Persimmon Pudding think of sweet and super moist bread pudding meets spice cake. If you can… close your eyes and think about a dessert that you grandmother might make in the Fall of 1976, you might not like this dessert as much as you like your grandmother’s chocolate cake, but you liked that she served her Persimmon Pudding with super melty vanilla ice cream… which made everything ok. There you go…. that’s Persimmon Pudding.

Persimmon Pudding
some old school Indiana newspaper 1976, adapted from Joy the Baker
makes 6 to 8 servings


2 cups fresh Hachiya persimmon pulp, removed from the skin
1/2 teaspoon baking soda
1/2 cup sugar
2 cups all-purpose GF flour
1 tsp. xanthum gum
1 teaspoon baking powder
pinch of salt
1/2 tsp. pumpkin pie spice
2 cups buttermilk
2 eggs
1 tablespoon melted butter, plus more for buttering dish

Preheat oven to 350 degrees F. Butter a 9×9 baking dish and set aside
Stir the baking soda and sugar into the persimmon pulp and set aside. This mixture may thicken as it sits…
Sift together flour, baking powder, salt and spices. Add to the persimmon mixture all at once and stir until flour is almost completely incorporated.
Whisk together  buttermilk, eggs and butter and add to the persimmon and flour mixture. Batter will be very loose. Pour into the baking dish.
Bake for 1 hour covered with foil, or uncovered. If you make the pudding covered, you’ll have a very wet and moist pudding. If you bake the pudding uncovered, you’ll have a drier pudding topped with a bread like crust. I baked my pudding covered for the first 30 minutes, then uncovered for the last 30 minutes. Bake the pudding until it is firm but still very moist.
Allow to sit at room temperature for 30 minutes before serving. Best served warm with vanilla ice cream.

Slow Cooker Chicken Taco Filling

What family doesn't love tacos, and what mom doesn't love a good slow cooker recipe? This recipe is the best of both, and as a bonus, calls for less expensive chicken thighs or  chicken breasts that can withstand hours of slow cooking without losing their texture. Happy Taco Tuesday from my home to yours.

Ingredients

  • 1 can Green chiles, diced
  • 1 jar GF salsa, (about 12 ounces; mild or spicy to taste)
  • 1 teaspoon Ground cumin
  • 1 whole onion, chopped
  • 2 cloves Garlic, minced
  • 2 pounds boneless, skinless chicken thighs or breasts

Directions

  1. Place chicken in the bowl of a slow cooker. Top with salsa, diced green chiles, cumin, onion and garlic. Cover and set on low. Cook for 8 hours.
  2. Remove chicken from pot, shred, and return to juices.
  3. Spoon chicken into taco shells, with whatever toppings your family likes. The filling is also great for tostadas or as a filling for enchiladas.

Wednesday, November 23, 2011

Gluten Free Maple Kahlua Pecan Pie

Perfect Thanksgiving Pie. Everyone saves room for Pie and to me Thanksgiving dessert is all about the Pie, whether Pecan, Pumpkin, Apple, the list goes on and on. I am usually a traditionalist when it come to Pecan Pie, but this year I decided to lighten it up a bit and add a twist with the Kahlua. What a magical creation of flavors. I am Thankful for my family, my health, being Gluten Free and this pie. What are you Thankful for?

Ingredients:
  • 1 Gluten Free Pie Crust, (I used Whole Foods Bakehouse Brand)
  • 3/4 cup pecan halves
  • 1/4 cup finely chopped pecans
  • 1/2 cup maple syrup
  • 1/2 cup dark corn syrup
  • 3 tablespoons brown sugar
  • 2 tablespoons butter, melted
  • 1 tablespoons Kahlua
  • 1 tablespoon GF vanilla extract
  • 1/4 teaspoon kosher salt
  • 2 large eggs, lightly beaten
  • 2 large egg whites, lightly beaten

Directions:

  • 1. Preheat oven to 350°.
  • 3. Combine pecans and remaining ingredients in a bowl, stirring well to combine. Pour filling into prepared crust. Bake at 350° for 38 minutes or until center of pie is almost set (shield edges of pie crust with foil if crust gets too brown). Cool on wire rack.

Monday, October 10, 2011

Autumn Ratatouille

This is my all time favorite Fall recipes, perfect for Meatless Monday. Only he has the patience to make it. The recipe is little involved, but the results are fantastic. Luxuriously rich, smooth, and flavorful, this ratatouille is practically the best way I know of preparing vegetables that people can't get enough to eat.

Preparation time:  3 hours 

Ingredients

  • 1 lb of yellow onions, chopped
  • 3 cloves garlic, crushed
  • 1 lb zucchini, chopped
  • 1 lb yellow squash, chopped
  • Bell peppers, seeds removed, chopped into 1/2 inch square pieces:
  • --1 lb green bell peppers
  • --1/2 lb red bell peppers
  • --1/2 lb yellow bell peppers
  • 1 lb eggplant, 1/2 inch cubes
  • 1 (14 1/2oz) can of good quality diced tomatoes
  • 1/4 cup olive oil
  • Salt to taste
  • 2 sprigs thyme
  • 1 bay leaf
  • 1-inch sprig rosemary
  • 3/4 cup white wine, vegetable broth or tomato sauce
  • Fresh ground pepper to taste

Method

1 Preheat oven to 250° F.

2 Using a large oven-proof pan over medium high heat, sauté onions in olive oil until they begin to soften, about 5 minutes. Add garlic and reduce heat to low.
3 While the onions and garlic are cooking over low heat, put 2 tablespoons of olive oil in a another frying pan over high heat. As soon as oil starts to smoke, quickly add enough zucchini cubes all at once to cover the bottom of the pan. Keep on cooking over high heat, stirring, until zucchini is lightly browned on all sides. Remove zucchini cubes, and add them to pan with the onions.
4 Working in batches, repeat this process until all of the zucchini cubes have been cooked. Do the same with the yellow squash. Make sure to add a little olive oil between each new batch. Continue with the bell peppers, then the eggplant cubes, adding the browned vegetables to the onion pan as soon as they are cooked.
5 When all the vegetables (except the tomatoes) are browned and in the pan with the onions, increase the heat to high and stir, making sure they don't stick to the bottom of the pan. Add salt to taste, thyme, bay leaf, and rosemary, the vegetable stock, and stir well. Place in oven, uncovered, for 2 hours, stirring occassionally.
6 Add the chopped tomatoes and cover. If serving as a warm side dish, let the ratatouille stand for 10 minutes, just enough to "cook" the tomatoes. The ratatouille can be served at room temperature or refrigerated and reheated the next day.
7 When ready to serve, remove the bay leaf, and season to taste with salt and pepper.

I like to serve this with Creamy Polenta....
Serves 6-8.

Wednesday, September 28, 2011

Date Honey Nut Cake

Ta Da! The Date Honey Nut Cake was born. This tasty loaf cake is a unique take on a traditional Rosh Hashanah honey cake. Dates are actually a symbolic food for Rosh Hashanah, so it’s a great choice for the holiday. In Hebrew, a date is called a “tamar,” which is related to the word “tam” (meaning “to end”) and the word “sheyitamu” (meaning “to be consumed”). Dates are eaten in the hopes that our enemies will be consumed. They also happen to be naturally sweet, which is another good reason to eat them for Rosh Hashanah (as we hope for a sweet new year). And here’s another fun fact– biblical scholars believe that the honey repeatedly mentioned in the Torah likely came from dates (and other fruits), not bees. Yet another good reason to eat dates for Rosh Hashanah!
So, what better way to enjoy dates than in a sweet, delicious honey cake? The dates provide lots of moisture, which makes this a convenient make-ahead dessert—the cake will not dry out if you make it a day or two before the holiday begins. The walnuts add some nice texture and crunch. It’s naturally dairy free, but can be topped with cream cheese frosting for some extra decadence. I hope this cake ends up on your holiday table. It will definitely be on mine. Yummy!

Ingredients

  • 3/4 cup (6 oz) whole dates
  • 1 cup gluten free flour, minus 2 tbls. of the flour and add 2 Tbls. Corn Starch. (Think GF Cake Flour)
  • 2 tsp baking powder
  • 1 tsp xanthum gum
  • 3/4 tsp cinnamon
  • 1/2 tsp salt
  • Pinch of nutmeg
  • 3/4 cup vegetable oil (I use canola)
  • 1/2 cup brown sugar
  • 1/4 cup honey, (I used local Sonoma County organic wild flower honey)
  • 3 eggs
  • 1 tsp GF vanilla
  • 1/2 cup chopped walnuts
  • Nonstick cooking spray

You will also need

  • 8- or 9-inch loaf pan, 2 mixing bowls
  • Preheat oven to 300 degrees F. Place dates into a bowl and cover them with very hot strong brewed coffee. (Hot water may also be used, if you'd rather) Let the dates soak while you prepare the cake batter.
  • In a large mixing bowl, sift together cake flour, baking powder, cinnamon, salt, and nutmeg.
  • In a medium mixing bowl, whisk together vegetable oil, brown sugar, honey, eggs, and vanilla.
  • Pour the wet ingredients into the dry ingredients and stir till a thick batter forms.
  • Drain liquid from the dates. Pit the dates, then chop the fruit into small chunks.
  • Fold the walnuts and date chunks into the batter.
  • Generously grease your loaf pan with cooking spray. Pour batter into loaf pan.
  • Place loaf pan in preheated oven. Bake cake for about 1 hour, or until a toothpick inserted in the center comes out clean. Remove from oven and set on a wire rack to cool.

Monday, August 22, 2011

Squash Quesadillas, Meatless Monday

It’s not too difficult to go meatless Monday in the summer. I mean, have you been to the farmers’ market lately? The stands are overflowing with tomatoes in every variety and color, squash, zucchini, onions, beans, peppers, nectarines; from a produce standpoint, it’s the best time of the year. My struggle with the market is restraining myself from wiping out the full stock of heirlooms or those tiny, yellow tomatoes that taste like candy. And if you’re lucky enough to have a garden, you’re bringing in quite the bounty from your yard, too. So like I said, eating vegetables on a summer Monday shouldn’t be a challenge. It might be tougher to stop scarfing down vegetables than it is to start.
So while you’re at the farmers market or in your garden, grab a bunch of zucchini or summer squash and some tomatoes. You’ll need them for this irresistible squash quesadilla. It’s comforting in the way that Tex-Mex food is, with little pockets of melted cheese topped with spicy salsa, but this version of the standard quesadilla is full of smoky, grilled squash. It’s so good, you might want to make two batches.

This recipe is flexible; you can use your outdoor grill or a grill pan inside. Make homemade roasted tomato salsa if you’ve got fresh tomatoes, or take a shortcut and serve the quesadillas with your favorite store-bought salsa.

Grilled Squash Quesadillas with a Charred Tomato Salsa

Makes 8 quesadillas

2 zucchini or summer squash, sliced lengthwise 1/4-inch thick
About 3 tablespoons olive oil or melted butter or a combination
Kosher salt and freshly ground black pepper
8 GF white corn tortillas
1/4 to 1/2 cup Ancho Chile Paste, recipe follows, or store-bought
8 ounces thinly sliced or shredded Manchego cheese, Monterey Jack is a good substitute
2 green onions (scallions), white and green parts, very thinly sliced

Charred Tomato Salsa, recipe follows, or your favorite green or red salsa

Heat a grill or grill pan over medium-high heat. Brush the zucchini with the oil or butter and season with salt and pepper. Grill, turning once until just soft, 3 to 4 minutes per side. Halve the grilled zucchini so they will fit into the tortillas.
Heat a skillet over medium heat and add about 1 tablespoon of the oil or butter. Lay a tortilla in the skillet and paint a light covering (more or less depending on your taste) of the Ancho Chile Paste over the tortilla. Scatter or lay a slice of cheese just big enough to cover half the tortilla (about 1/2 ounce). Then add a strip or 2 of zucchini and some scallion slices and cover with another layer of cheese. Cook until the tortilla softens, about 1 minute. Fold the tortilla over into a half moon. Flip and cook on each side until golden brown and crisp and the cheese melts, adding more oil or butter if the pan gets dry, 2 to 3 minutes per side. Repeat with the remaining ingredients.
Cut the quesadillas into wedges and serve with the Charred Tomato Salsa, or your favorite homemade or store bought salsa..

.
Ancho Chile Paste:
6 dried ancho or pasilla chiles or a mixture
1 teaspoon Kosher salt
2 tablespoons extra-virgin olive oil or grapeseed oil

Stem, seed and pull the chiles in half. Toast the pieces in a dry skillet over medium heat, turning until fragrant and blistered but not charred, about 1 minute. Transfer to a bowl of boiling water and set aside to soften, 30 to 40 minutes.
Put the chiles in a blender with the salt (not a food processor, it won’t be fine enough) and puree until very smooth. Add some of the soaking water, about 1/2 cup, if needed to engage the blender. Strain if desired.
Heat the olive oil in a medium skillet over medium heat. Add the paste and fry, stirring with a wooden spoon, until the mixture is thick, 3 to 5 minutes. Cool and store in the refrigerator for up to 1 month. Makes 1 1/2 cups.

Charred Tomato Salsa:
Position rack in the upper part of the oven and preheat the broiler. Line a small broiler pan with foil.
Place the tomatoes and jalapeno in the pan and broil, turning them as needed, until the skins blacken and split, 15 to 20 minutes. Wrap completely in aluminum foil and cool.
Core the tomatoes and stem the jalapeno (remove the seeds if you want to temper the heat). Puree the tomatoes, skins and all, with the jalapeno, oil, garlic and scallions and in a blender to make a smooth sauce. Pulse in the cilantro. Transfer the sauce to a bowl and stir in 1/2 teaspoon salt. (The salsa thickens a bit if prepared ahead and chilled; stir to loosen it up before serving.) Makes about 1 1/2 to 2 cups.
4 ripe medium tomatoes (about 1 pound)
1 jalapeno
2 tablespoons extra-virgin olive oil
1 clove garlic, minced
1 scallion, white and green parts chopped
1/2 cup fresh cilantro leaves
Kosher salt

Saturday, August 6, 2011

One of my favortie frozen treats is frozen chocolate dipped bananas. Oh it brings back momories of being a child. It is my guiltless pleasure, much better for you than ice cream. I have never tried to make them myself, but thought why not. Can't be that hard. So here went nothing and turned into everything. I usually get my frozen bananas dipped in chocokate and nuts but I had no almonds and those are my favorite, so I decided to try coconut instead. Voila!!


FROZEN BANANA BITES

What you'll need . . .

  • 2 large bananas
  • 1/4 to 1/3 cup milk chocolate chips
  • 1/4 to 1/3 cup natural peanut butter
  • Unsweetened coconut flakes


Instructions:
  1. Set out a large plate or bowl with a piece of parchment or wax paper on it.
  2. Cut up the bananas into good-sized chunks. Each banana should give you around 5 to 6 pieces.
  3. Heat the peanut butter and chocolate chips in the microwave on high for about a minute. Then stir until smooth.
  4. Dip the banana pieces in the chocolate-peanut butter mixture. Lay them out leaving some space between them on the parchment/wax paper. Then when you've "covered" them all, use the remaining mixture to spoon over the tops.
  5. Then sprinkle the unsweetened coconut flakes on top. Transfer to the freezer for about an hour until hardened.
  6. You can enjoy them like this (but they really aren't frozen yet -- and when they're frozen, the banana tastes like vanilla ice cream) . . . I suggest then covering with some plastic wrap (or really you can do all of this in some kind of Rubbermaid container) and let freeze overnight.

Thursday, August 4, 2011

Au Gratin Potatoes


I was recently looking through my Betty Crocker's cookbook, I like to find everyday recipes that are either naturally Gluten Free or can be adapted to be Gluten Free. I saw a recipe for Au gratin potatoes and it looked and sounded so rich, creamy and delicious. Definitely not healthy but sometimes you have to splurge - you know? I was roasting a chicken for dinner and decided the Au gratin potatoes would be the perfect side dish. This was really easy to make (as long as you have a mandolin slicer or cuisinart food processor with the slicing attachment, to cut the potatoes. I used sharp cheddar because it's what I had on hand. I also used non-fat milk because, well, it has plenty of fat with the cheese and butter. It was a huge hit with my entire family. It paired very nicely with my roasted chicken and a fresh green salad.
  • 4-5 large Idaho russet potatoes, peeled and sliced 1/8 th inch thick
  • 1/4 cup butter
  • 1/2 sweet yellow onion, finely diced
  • 1 tbsp rice flour
  • Sea salt and fresh cracked pepper to taste
  • 2 cups non fat milk
  • 2 cups sharp cheddar cheese, shredded (divided)
  • 1/4 dry GF Panko bread crumbs (I use kinnikinnick brand)
Preheat oven to 375 degrees. Spray a baking dish with cooking spray. Scrub potatoes and peel. Cut into 1/8-inch slices to measure about 4 cups. If you have a mandolin slicer, use it.
 
Melt butter in saucepan over medium heat. Cook onion in butter about 2 minutes, stirring occasionally, until tender. Whisk in rice flour, salt and pepper. Cook, stirring constantly, until bubbly; remove from heat.

Slowly stir in milk and 1 1/2 cups of the cheese. Heat to boiling, stirring constantly. Boil and stir 1 minute until the cheese is completely melted.

Spread potatoes in casserole dish. Pour cheese sauce over potatoes. Bake uncovered for 70 minutes. Mix remaining cheese and the GF bread crumbs; sprinkle over potatoes; add a bit more salt and pepper. Bake uncovered 20 minutes longer or until top is brown and bubbly.

Wednesday, August 3, 2011

Battered Onion Rings

Battered Onion Rings


Ingredients

2 eggs
1 cup milk (dairy or rice)
1 cup all-purpose GFflour (I used Bob's Red Mill)
2 teaspoons non aluminium baking powder
2 teaspoons garlic salt or onion salt
1 teaspoon cayenne (optional -does not make hot/spicy)
1 quart oil for frying, I used Canola Oil
4 large onions, peeled and sliced into rings, I used Wala Wala Sweet Onions


Directions

Whisk together eggs, milk, flour, baking powder, cayenne, and garlic salt in a bowl to make a smooth batter.
Then divide the batter into two bowls (reasoning is that the batter gets clumpy and you will want to switch to the other bowl about 2 onions in)

Heat the oil in a large saucepan or deep fryer. The oil needs to be fairly hot.

Dip the onion rings evenly into the batter, then fry in the oil for 2 to 3 minutes, until the onion rings are golden brown. With a slotted spoon, remove the onion rings to paper towels to drain. Serve hot for best taste!

*** If you choose not to use cayenne, use something else, like Italian seasoning, or maybe even a "mix" of seasoning that you have made. They taste better seasoned, but if your kiddo likes plain, then omit the cayenne.

Wednesday, July 20, 2011

Apricot Glazed Pork Loin

Pork Loin Farm Raised without hormones or antibiotics from the local farmers market. So, incredibly delicious. A kid favorite around here. We were in heaven! A simple, decicious dinner.
Such simple ingredients to create a divine dish!

2 lbs. free range pork loin roasts
fresh cracked pepper
2 Tblsp. GF Apricot Jam (I used a jam with no sugar – sweetened in fruit juice)
1 Tblsp. GF Tamari Sauce, I use San-J
1 tsp. Dijon Mustard
2 minced garlic cloves
Preheat the oven to 375 degrees. Place the loins onto a rack in a roasting pan. Season well with pepper, and place into the oven.
Meanwhile, in a bowl mix up the Apricot Dijon Glaze and set aside. Twenty minutes into the cooking time, pour the glaze over the tenderloins, spreading evenly. Continue to bake for another 20-30 minutes, until cooked through or has reached an internal temperature of 160 degrees.
Place on a platter, covered in foil to rest for 10 minutes.
Slice and serve. Delicious served with brown rice and your favorite vegetable

Monday, July 18, 2011

Chicken, Shrimp and Rice Stew

Chicken, Shrimp and Rice Stew
 2T fresh oregano leaves
2T fresh thyme leaves
4 garlic cloves sliced thin
6 boneless chicken thighs, cubed in 1” pieces
2 slices fruit wood smoked thick cut bacon, cut in 1” pieces
5T olive oil
1 scotch bonnet pepper
1 large onion, minced
1 red pepper, chopped
1 yellow pepper, chopped
1 cup fresh tomatoes, chopped
½ cup grated coconut, toasted….don’t use the sweetened kind
1 cup white wine
2 cups long grain white rice
4 cups GF chicken stock
Freshly ground black pepper
1 cup fresh or frozen cooked green peas
1 lb. wild ocean caught shrimp, U-15 size work best, peeled and deveined
Juice of 1 lime

Marinate the chicken with thyme, oregano and garlic.
Set aside.
In a large heavy skillet on medium heat, heat the oil and saute the chicken to brown on all sides.
Set Aside
Add the bacon and saute until browned.
Add the onions, peppers, hot pepper and stir for a few minutes to cook through.
Add the tomatoes.
Add the rice and coconut and stir to coat with vegetables. Add the wine and cook for a few minutes to cook away half the liquid.
Add the chicken stock and freshly ground pepper to taste. bring to a boil and cover and cook over low heat for 20 minutes
Remove the cover and stir in the shrimp, peas and lime juice.
Cover and cook for 6-8 minutes more.
Season to taste with sea salt, and serve immediately

Wednesday, June 29, 2011

Green Goddess Dressing


You see, Green Goddess is much more than a dressing. Since I've started making it, it's made its way into a variety of applications. It makes a fantastic dip for just about anything on its own, but toss it into a blender with some white beans and you've got something rather special indeed. I have seen it as a dressing for cold pasta, and served with grilled jumbo shrimp; I think scallops would be at least as delightful.
In researching the dressing, I came across a lot of different recipes with a surprising amount of variation: Different proportions of mayonnaise, plain greek yogurt, sour cream and vinegar; with or without anchovy; and while nearly all call for parsley and chives, others called for basil, tarragon, thyme, mint and even chervil. Despite Martha's greatest efforts to market it, however, chervil remains an elusive ingredient for most of us. While they call for parsley and chives, the original evidently did not include tarragon; this will not stand. For reasons I cannot justify, in my mind Green Goddess must have tarragon. Must. So I added it. And I stand by that decision. Fact is, you could tweak this recipe ten times till Tuesday, and you'd still end up with a delicious, refreshing dressing, so have at it. I opted to use a variet of herbs from this years herb garden. I have a combination of basil, mint, chives, Italian parsley and tarragon.


3/4 c. GF real mayonnaise
1/4 c. GF sour cream
1/4 c. each chives, parsley and tarragon, finely chopped

a small handful of fresh mint, about 6 leaves
a small handful of fresh basil beaves, about 6 leaves
1 small garlic clove
1 Tbsp fresh squeezed lemon juice
1 Tbsp white wine vinegar
Salt and pepper to taste


In the bowl of a food processor, mince the herbs and garlic. Add the sour cream, mayonnaise, vinegar and lemon juice, pulse to blend. Season with salt and fresh ground black pepper. Pulse to combine. Transfer to and air tight container.  Cover and refrigerate. Best if made several hours or up to a day ahead.

Thursday, June 23, 2011

No Bake Peanut Butter Chocolate Bars

Happy Summer Solstice! Welcome to the first official day of summer and the heat came with it. I have to admit I feel a bit like summer break has been going on for quite a while in our household, but I know that many of my friends’ children are just finishing up the school year and that is certainly reason to celebrate.


What exactly is the summer solstice? On this day, the Earth’s and the moon’s axial tilt is most inclined towards the sun, and therefore we have the longest period of daylight today. So how are you going to make the most of it? I recommend making something delicious. In fact, I recommend making these no bake peanut butter bars. I made them for the first time today and boy are they delicious. And the vote was unanimous, from my kids, that they are thumbs up delicious. Recipe adapted from southernplate.com

Ingredients:
1/2 cup butter
1/2 cup packed light brown sugar
1 teaspoon GF vanilla extract
2 cups smooth GF peanut butter
2- 1/2 cups confectioners sugar
11.5 ounce bag milk chocolate (or semi-sweet) chips
Gluten Free Pretzel sticks, I used Synders of Hanover GF

Put butter, brown sugar, and peanut butter in a large microwave safe bowl. Microwave until butter and peanut butter are melted, one to two minutes (time will vary by microwave). Remove from microwave and add vanilla and confectioner’s sugar. Mix all of the ingredients together until they form a ball of dough that leaves the side of the bowl. Put in a 9×13 pan and press down.
Pour chocolate chips in a small microwave bowl and microwave at 30 second intervals, stirring after each interval until melted. Pour over top of peanut butter mixture and spread evenly. Break pretzel sticks up into smaller pieces and sprinkle on top. Push gently into chocolate. Allow to cool completely at room temperature or place in the refrigerator until chocolate hardens. Slice into squares. Makes about 24 squares.

Sunday, June 19, 2011

Gluten Free Sugar Free Almond Cake, In honor of Fathers Day

Gluten-Free Almond Cake

Almond
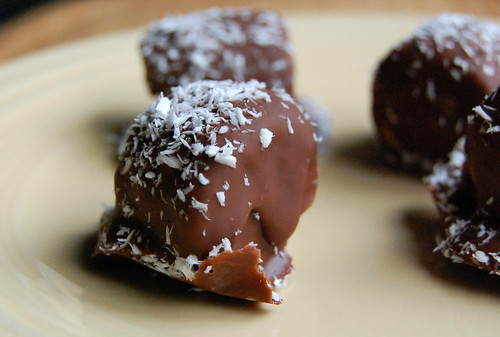
When it comes to baking, my biggest challenge is creating recipes that are both gluten free and relatively healthy. I stumbled upon this recipe from allrecipes.com of all places. It is pretty simple to make, has only 4 ingredients, but such a rich and wonderful texture and taste. And it’s super high in protein since it’s made of almonds. With a few minor adjustments to the original recipe, this is another guiltless but tasty dessert!
Almonds are great – they are full of goodness! They contain high quality and highly absorbable protein, as well as magnesium, phosphorus, iron, vitamin E and vitamin B complex. Almonds are rich in calcium as well, making them an excellent substitute for dairy products.
For this recipe, you will need ground almonds. These can be purchased from most grocery stores and health food stores, I buy mine from Trader Joes, or you can grind them up yourself to a fine powder.
Enjoy!

You’ll need:
  • 4 eggs (farm fresh are preferable)
  • 3/4 cup good sugar (such as agave nectar, succanat, or cane sugar if the other 2 are not available)
  • 2 cups finely ground almonds
  • 2  teaspoons vanilla extract
Directions:
1. Pre-heat oven to 325 degrees F (165 degrees C). Prepare an 8 inch round baking pan by lining bottom with either parchment paper, or lightly greasing it using a good fat such as coconut oil.
2. In a bowl, beat the eggs until thick and tripled in volume. Add sugar slowly, beating until very thick. Slowly fold in extract and then almonds. Pour batter into prepared pan.
3. Bake for 30 minutes or until golden on top and slightly browned on edges. Cool in pan for 10 minutes then turn out.
- Can add slivered almonds and/or powdered sugar on top

Tuesday, June 14, 2011

Being Athletic and Gluten Free

So a bit more about me. I am an athlete, more specifically a long distance runner and workout enthusiast. I love to hit the weight room at the gym, building my muscles feels powerful. Running is my excape from my life.  It is my stress reliever, my savior, my anti-depressant, my friend, my me time. I too am Gluten intolerant and the mom of 2 children with special needs.

So what is Gluten? Gluten is a combination of two proteins: gliadin and glutenin. Both are found in the endosperm of the wheat, barley and rye plants. Gluten is the protein that nourishes wheat during germination from seed to plant. The glutenin in wheat flour gives dough its elasticity and allows leavening; glutenin also contributes to the chewiness of baked goods. For many people, these proteins do not digest appropriately and the body reacts with a variety of symptoms.
Some of the most common symptoms of a gluten intolerance are unexplained aches, fatigue, headaches, joint or muscle pain, bloating or other digestion problems. Gluten intolerance, also known as celiac disease, is a condition which has been gaining recognition as a contributing factor in many health issues. New evidence suggests that as many as 1 in 10 people are gluten sensitive, or gluten intolerant. Many autoimmune illnesses may also be associated with gluten intolerance such as, fibromyalgia, chronic fatigue, rheumatoid arthritis, thyroid disorders and diabetes. About 1 percent of the North American population is estimated to have celiac disease. Celiac disease is currently described as damage to and mal absorption of nutrients in the small intestine. Gluten may inflict damage on other areas of the body as well.
Whether you are an elite or a recreational athlete, your diet typically relies on adequate carbohydrate intake. The majority of this energy is derived from the gluten containing grains. When these foods are eliminated from the diet, there is a chance that an athlete may not be able to refuel correctly, or they may become deficient in important nutrients such as B-vitamins, forms of iron and fiber.
Some athletes are afraid to follow a gluten-free diet because they are concerned about their carbohydrate/energy intake. Carbohydrates before, during and after training or competition are essential in maintaining energy levels, regulated blood sugar, prevention of fatigue, and quick recovery after an event.
In fact, some athletes believe that following a gluten-free diet has performance enhancing advantages. The reason is that athletes choose high glycemic, refined or processed carbohydrates as a quick recovery food, most of these choices contain gluten. When these foods are eliminated from the diet the benefits outweigh the risks, elevated performance results from a diet that is low glycemic index, high fiber, and adequate in lean protein.
The rationale behind why many athletes follow gluten-free diets is basically to ease unappealing digestive symptoms during competition. Improved digestion leads to improved absorption of nutrients, which can then translate into improved performance. Based on anecdotal evidence, it appears that there is potential for improved performance in athletes who eat a gluten-free diet even if they are not diagnosed with an allergy or celiac disease.
Carbohydrates are an important source of energy, especially during exercise. The recommended intake of carbohydrates is up to 15 g/kg of body weight yet; type of sport, energy output and climate may affect the recommendation. Breads, pasta, cereal, rice, and fruit are the common food products that an athlete is likely to choose. Unfortunately, those diagnosed with celiac disease are unable to eat the wheat based items. Typical healthy carbohydrate substitutions within a gluten-free diet include all varieties of rice, organic corn, flaxseeds, quinoa, tapioca, potato, amaranth, tofu, nuts, and beans.
Following a gluten-free diet does show some advantages:
1. With gluten removed, the body's immune system can rest and absorption can be restored. The body can then function at optimal levels and repair muscles more efficiently.
2. The hypoglycemic effect that results from intense exercise is minimized.
3. A gluten-free diet helps to maintain a stable blood sugar level during exercise, which is optimal for an increase in muscle strength and stamina.

Tips to Live Gluten-Free

1. Emphasize the foods which are naturally gluten-free, such as vegetables, fruits, starchy vegetables, legumes, and certain whole grains.
2. Choose fresh vegetables or frozen without sauce, fresh, dried or frozen fruits, all varieties of fresh corn, potatoes, and squash, dried beans and lentils, whole grains such as certified gluten-free, breads, cereals, pastas, granola, oats, millet, quinoa, amaranth, sorghum, teff, corn tortilla, tapioca, all varieties of rice, eggs, organic tofu, all natural nut butters, cold pressed oils, and vinegars.
3. Read food labels. The Food Allergen Labeling and Consumer Protection Act states that 'wheat' must be on the food label if wheat is used in the food. This is not true for barley and rye; food manufacturers do not have to label foods that contain barley or rye. If you are unsure about a products' ingredients avoid it. Labels must be read every time that you purchase food. Manufacturers can change ingredients at any time.
Follow these steps to ensure that every packaged food that you buy is gluten-free:
Look for 'GLUTEN FREE" clearly labeled on the packaging. If it is labeled certified gluten-free, then it is safe.
Read the allergen statement. If the product contains wheat, put the food down and look for another option. If the product does not contain wheat, then...
Look for a statement regarding the facility in which the food was processed. If the food was processed in a factory that also processes wheat, put the food down and look for another option.

Avoid Cross-Contamination

Tiny amounts of gluten hidden in foods will cause damage to the intestinal lining. Avoid cross contamination in your home and when eating outside of your home.
If you live alone, throw out or give away anything that contains gluten or could have been contaminated with gluten, such as peanut butter or mayonnaise. If you live with others, place vividly colored stickers on gluten-free foods.
Discard wooden cooking utensils, cutting boards and non-stick pans that may be contaminated with gluten.
Use soap and water liberally. Clean dishes and utensils very well to remove gluten. Keep your sponge clean.
At the market avoid bulk bins with shared scoops.
Flour sifters and mesh colanders should not be shared with gluten-containing flours.
Deep fried foods cooked in oil shared with breaded products should not be consumed.

Living with Allergy/Intolerance

It is natural to mourn old food habits for a period of time after being diagnosed with celiac disease or gluten intolerance. Stay focused on all of the foods that you can eat. Appreciate how your diet, health and sport may improve.

Thursday, June 2, 2011

Another way to cook pasta – Pasta "risottata" with fava beans, zucchini and tomatoes

After this past few weeks, I needed to eat something to soothe my mind…Pasta especially pasta in bianco (with  parmigiano, butter and parmesan) I am not Italian, but I have a love of food and cooking ethnic food from around the world. There are indeed many ways to cook pasta, one less known method is called “risottata“, meaning like a risotto where broth is added gradually. I did not come up with it, it’s a very old Italian method of cooking pasta! so, no pasta is not always boiled in salted water, drained and served topped with sauce. There is an interesting and funny article in English about the different cooking methods and cooking time of pasta on Identità Golose.


Pasta risottata being cooked a long time, takes longer than the usual way of boiling it in water. The risottata method allows it to keep its starch, therefore develop a particular creaminess......can you just imagine the deliciousness of the pasta while having absorbed all that flavorful broth? It’s really my newest favorite way to cook and eat pasta. You need to try to believe it. For this cooking method, you need short pasta (pasta corta) such as small penne or fussilli or a small shell, or anything that size.
The recipe is quite simple, the greatness of the pasta comes first from the risottata method, then the combination of the ingredients make it a real treat.
Ingredients for 4
  • 16 oz brown rice pasta fissilli
  • 1 1/2 pounds fresh fava beans, pod removed
  • 4 zucchini, diced in small cubes
  • 1 can diced organic tomatos in rich juice
  • 4 cups vegetable broth
  • 1/4 chopped red onion
  • 1 garlic clove
  • olive oil and butter
  • Parmigiano Reggiano, freshly grated
  • salt and pepper
Preparation
Heat 1 T. oilive oil and 1 T. butter in a pan and add garlic, stir for a few minutes, then add zucchini, cover and let cook until the zucchini start to be cooked but firm, then add tomatoes, salt and pepper.  Set aside.
In the meantime, blanch fava bean grains in boiling water for about 2 minutes depending on the size of the grains. IF the grains are small and tender, one minute is enough. Drain and peel beans. Add to the pan with the other vegetables.
In a pot, heat olive oil, add red onion and saute. Add pasta and proceed like you would for a risotto, adding gradually broth to cook it. When the pasta has reached the desired consistency (it will need to be slightly creamy), add vegetables and parmesan. Stir well and serve hot.

Monday, May 23, 2011

Granola Pie Crust, Gluten Free

Ok, here is a really good pie crust whether or not you are gluten free, but it is a perfect option for those that have to eat gluten free. It is a crust that can be used in so many ways and is one that many people would not think twice about being gluten free.
Now you do need gluten free granola for this, If you don’t keep gluten free granola on hand this pie crust would be the perfect excuse to make some. Gluten free granola can also be found in many health food stores or in the gluten free section of your grocery store.
I made this crust for my cheesecake recipe but this crust would work well for just about any no bake pie or any pie that you would use a graham cracker crust for.

Scoop the yogurt filling into pie crust and spread it out.

Wednesday, May 18, 2011

Welcome Sunshine

Well, we are in the middle of May and it has been a wet one in California. It has felt more like February, mor elike cooking comfort foods rather than spring foods. Today we have sunshine though, at least for the time being, there are scattered showers predicted for the afternoon. I will take this bit of sunshine and write to you all. I am going back a few days to my meatless Monday, yet it is Wednesday. On Monday I tried my hand at a new recipe, something like a cross between eggplant parmesan and lasagne roll-ups. Think Lasagne minus the noodles and add the eggplant minus the breading and frying. I have to say it turned out great. Served with Creamy Polenta and a mixed herb salad. It was the perfect meatless meal.

Feel free to use your favorite fresh tomato sauce or a purchased sauce in place of the tomato and roasted red pepper sauce.
Ingredients:
  • 1 medium eggplant
  • Olive oil, to brush the eggplant with
  • 1 tablespoon olive oil
  • 1/2 onion, finely chopped
  • 3 cloves garlic, minced
  • 1/2 cup diced red peppers
  • 2 large tomatoes, seeded, peeled, chopped
  • 1/2 teaspoon dried basil
  • 1/4 teaspoon salt
  • dash pepper
  • 1 cup shredded mozzarella cheese
  • ***Filling***
  • 1 cup ricotta cheese or cottage cheese (I used cottage cheese because that is what I had at home)
  • 1/4 cup fresh shredded Parmesan cheese
  • 1/2 teaspoon dried leaf basil
  • 1 to 2 teaspoons fresh chopped parsley
  • 1/4 teaspoon salt
  • dash pepper

Preparation:

Remove ends from the eggplant. Slice lengthwise into 1/4-inch slices. Brush a large baking sheet with  olive oil and arrange the slices on the baking sheet in a single layer. Brush the sliced eggplant with olive oil. Broil until browned. Heat the olive oil in a large skillet over medium heat; add onion and sauté just until tender. Add garlic and sauté for 1 minute longer. Add peppers, tomato, 1/2 teaspoon basil, 1/4 teaspoon salt, and a dash of pepper. Reduce heat to medium low, cover, and simmer, stirring occasionally, for about 5-10 minutes, until vegetables are softened.
Combine the filling ingredients, mixing to blend well.
Heat oven to 375°.
Spoon half of the tomato mixture into a baking dish. Spoon a few teaspoons of the cheese mixture onto the end of each slice of eggplant. Roll up and place on the tomato mixture, seam-side down. Repeat with remaining eggplant slices. Top with remaining tomato sauce. Cover the baking dish with foil and bake for 20 minutes. Remove the foil, top with shredded mozarella cheese and return to oven until cheese is melted, about 10 minutes, uncovered.

Wednesday, May 11, 2011

Eat what you want day

May 11, 2011 is

Eat What You Want Day

National Eat Whatever You Want Day! Presented by BookPeople and BookPeople at BookPeople. May 26, 2010. Be the first to submit a review/comment!

Eat What Your Want Day is officially here. That means you have a whole day dedicated to eating only the foods you love. That doesn't necessarily give you free reign to each chips and candy all day though. In our diet-crazed culture, we sometimes forget that healthy foods can be foods that you love too. What's better than a juicy nectarine on a summer day? Or freshly cut apple slices dipped in peanut butter?
Diets have become wild-crazed fads in the United States. From no carb diets to consuming only cayenne pepper lemonade drinks, people will do anything and everything to lose a few pounds. It's those diets that often make us feel like we're deprived of sweets or missing out on foods that we really enjoy. For example, it's probably okay to have a cup of ice cream, but do so in moderation.
Celebrate Eat What You Want Day by enjoying some of your favorite Gluten Free healthy and not-so-healthy foods. You can even use today to reevaluate what foods you keep in your house and make sure that you make every bite count with tasty foods that both delicious and good for you!

Monday, May 9, 2011

Asparagus Risotto

     In California winter can transition to spring in a flash. It seems like yesterday we were beset by chilly storms while the forecast for this week is all sunny and 70s. Daffodils are blooming, as are cherry trees, and the truest test of spring, asparagus in the market can be found for less than $2 a pound. I just couldn't resist these at the market today, and cooked them up into a creamy risotto, perfect for meatless Monday. This is a classic asparagus risotto recipe. You can easily dress it up with some lemon zest, lump crab meat, green onions, truffle salt, fresh thyme or chopped mint. Serve with a freshly baked loaf of Gluten Free Bread, such as Breads from Anna, Gluten Free Herb bread mix. https://breadsfromanna.com/products/gluten_soy_nut_rice_free
You won't be disappointed.

Asparagus Risotto Recipe


Ingredients:

.

Directions

asparagus-risotto-5.jpg
1 Prepare the asparagus by breaking off discarding the tough ends (about the last inch of the spear). Cut into 1 to 1 1/2-inch pieces (tips longer, base shorter). If your asparagus are especially large, cut into even smaller (bite-size) pieces. Bring a saucepan with a quart of water to a boil. Blanch the asparagus pieces for 2 minutes. At the end of two minutes, use a slotted spoon to remove the asparagus pieces to an ice water bath to shock the asparagus into a vibrant green color and to stop the cooking. Drain from the ice water bath and set aside.
asparagus-risotto-1.jpg asparagus-risotto-2.jpg
2 In a 3 or 4 quart saucepan, heat 3 Tbsp butter on medium heat. Add the shallots and cook for a few minutes until translucent. Add the rice and cook for 2 minutes more, stirring until nicely coated.
3 While the shallots are cooking, bring the stock to a simmer in a saucepan.
asparagus-risotto-3.jpg asparagus-risotto-4.jpg
4 Add the wine. Slowly stir, allowing the rice to absorb the wine. Once the wine is almost completely absorbed, add 1/2 cup of stock to the rice. Continue to stir until the liquid is almost completely absorbed, adding more stock in 1/2 cup increments. Stir often to prevent the rice from sticking to the bottom of the pan. Continue cooking and stirring rice, adding a little bit of broth at a time, cooking and stirring until it is absorbed, until the rice is tender, but still firm to the bite, about 15 to 20 minutes. Remove from heat.
Note the stock amount given is approximate. You may need a little more or less. If you end up needing more stock and you find yourself without, just use water or the cooking water from the asparagus.
asparagus-risotto-6.jpg
5 Gently stir in the Parmesan cheese, the remaining 1 teaspoon butter, and the asparagus. Add salt and pepper to taste. Serve immediately.

Tuesday, April 26, 2011

Hmmm, what to make with leftover strawberries and bananas?

With the beginning of Spring upon us and Strawberries are on sale, an incredible buy 1 basket get 2 free or when I have fresh strawberries on hand and ripe bananas sitting on the counter waiting to be used. I often turn to Strawberry Banana Muffins. Maybe you think this is an unusual combination for muffins, bananas and strawberries, but actually these two sweet fruits go quite well together. One thing these two fruits have in common is that while available year round they both are at their best in Spring.
Muffins belong to the 'quick bread' family and indeed these Strawberry Banana Muffins are quick to make. Just two bowls are needed; one for the wet ingredients and one for the dry. Combine the two ingredients together, using a light hand, and your batter is made. One tip I have found to make life easier is to use an ice cream scoop for transferring the batter to the muffin tins. And while you can place paper liners in each muffin cup I usually just give the pan a quick spray with a nonstick vegetable spray (can also grease with butter). If you want giant sized muffins then this batter will make six. Otherwise you will get 12 regular sized muffins. Just remember that if making giant muffins you will have to increase the baking time by about 5 minutes. They are done when a toothpick inserted into the center of the muffin comes out clean.
For times when you have overripe bananas and don't want to bake with them right away, you can freeze them whole (in their peels), wrapped airtight, for up to 6 months. Or you can peel and mash them, stir in 1 teaspoon lemon juice for each banana, and freeze in an airtight container or bag. Then you are ready to make banana muffins anytime.

This original recipe was adapted from Oregon's Cuisine of the Rain by Karen Brooks.

Strawberry Banana Muffins Recipe:

1/2 cup (1 stick)  butter or margarine, melted
3/4 cup light brown sugar or agave nectar
2 large eggs, lightly beaten
1 teaspoon GF pure vanilla extract
2 large ripe bananas, mashed (about 1 cup)
1 cup fresh strawberries (cut into bite sized pieces)
1 1/4 cups all-purpose GF flour blend, (I used better batter)
1 cup almond flour
*1 tsp. xanthum gum (if your flour mixture doesn't already include it)
1 1/2 teaspoons GF baking powder
1/4 teaspoon GF baking soda
1 teaspoon cinnamon
1/2 teaspoon salt


Strawberry Banana Muffins:

Preheat oven to 350 degrees F . Position rack in center of oven. Line a 12 cup muffin pan with paper liners or grease with butter or a vegetable spray.
In a small saucepan melt the butter. Set aside.
In a medium sized bowl whisk together the brown sugar or agave nectar, eggs, vanilla extract and mashed banana. Add the melted butter to the egg mixture and stir to combine.

In another large bowl combine the flours, baking powder, baking soda, cinnamon, (xanthum gum if using) and salt. Gently fold in the berries, making sure they are coated with flour. This helps to prevent the berries from sinking during baking. Add the wet ingredients to the dry ingredients and stir only until the ingredients are just combined. Divide the batter evenly among the 12 muffin cups, using two spoons or an ice cream scoop. Place in the oven and bake until a tester inserted in the center of a muffin comes out clean, 20 to 25 minutes. Transfer to a wire rack to cool.


Makes 12 regular sized muffins.


Monday, April 18, 2011

Meatless Monday, Here we go again, So simple, and so delicious!


Lentils and Rice with Fried Onions (Mujadarrah) Recipe

Fried onions are mixed with rice and lentils, and topped with yogurt or sour cream.
This may sound like a plain recipe, but believe me, it's wonderful! It is an easy-to-make vegetarian comfort food that combines lentils, rice and delicious fried onions. The yogurt really gives it a super flavor!

  • 6 tablespoons olive oil

  • 1 large white onion, sliced into rings

  • 1 1/3 cups uncooked green lentils

  • 3/4 cup uncooked long-grain white rice

  • salt and pepper to taste

  • 1/4 cup plain yogurt or sour cream (optional)

  • Directions

    1. Heat the olive oil in a large skillet over medium heat. Stir in the onions, and cook about 10 minutes, until browned. Remove from heat, and set aside.
    2. Place lentils in a medium saucepan with enough lightly salted water to cover. Bring to a boil, reduce heat, and simmer about 15 minutes.
    3. Stir rice and enough water to cover into the saucepan with the lentils. Season with salt and pepper. Cover saucepan, and continue to simmer 15 to 20 minutes, until rice and lentils are tender.
    4. Mix half the onions into the lentil mixture. Top with yogurt or sour cream and remaining onions to serve.

    1.Heat the olive oil in a large skillet over medium heat. Stir in the onions, and cook about 10 minutes, until browned. Remove from heat, and set aside.
    2.Place lentils in a medium saucepan with enough lightly salted water to cover. Bring to a boil, reduce heat, and simmer about 15 minutes.
    3.Stir rice and enough water to cover into the saucepan with the lentils. Season with salt and pepper. Cover saucepan, and continue to simmer 15 to 20 minutes, until rice and lentils are tender.
    4.Mix half the onions into the lentil mixture. Top with yogurt or sour cream and remaining onions to s

    Monday, April 11, 2011

    Another Meatless Monday, Asian Style

    This recipe for Asian Peanut Noodles is similar to Pad Thai noodle dishes popular at Thai restaurants. Add some stir-fried chicken and veggies (recipe for my favorite vegetable stirfry is included on the bottom of this page), and you've got a tasty dinner that's almost as good as that takeout place down the street.


    Asian Peanut Noodles
    • 14.5 oz GF Vegetable broth
    • 5 tbsp natural  peanut butter
    • 1 tbsp sriracha chili sauce
    • 2 tbsp honey
    • 2 tbsp GF tamari (soy sauce)
    • 1 tbsp freshly grated ginger
    • 3 cloves garlic, minced
    • salt and pepper (to taste)
    • 8 oz rice noodles
    • 2 tbsp chopped peanuts 
    • 1 lime, sliced
    • 3/4 cup scallions (green onion), chopped
    • Cilantro, chopped (optional)
    Combine 1 cup vegetable broth, peanut butter, sriracha, honey, soy sauce, ginger, and garlic in a small saucepan and simmer over medium-low heat stirring occasionally until sauce becomes smooth and well blended, about 5-10 minutes.
    Cook noodles according to package directions. Drain and toss with peanut sauce, adding additional chicken broth if needed to loosen sauce. Top with chopped peanuts, scallions, cilantro (if using), and squeeze of fresh lime.

    I like to serve this with my Thai inspired Stir Fried Vegetables
    • 1 medium-size carrot, sliced
    • 1-2 cups baby bok choy
    • 1 red pepper, cut into bite-size pieces
    • 5-6 mushrooms, sliced, or left in halves or quarters
    • 3 spring onions, cut in thirds
    • 1 small head broccoli, cut into florets
    STIR-FRY SAUCE:
    • 1/3 cup vegetable stock
    • 2 Tbsp. fish sauce (or substitute 2.5 Tbsp. GF tamari  (soy sauce))
    • 1 Tbsp. lime juice
    • 5-7 cloves of garlic, minced
    • 1 tsp. liquid honey (or substitute agave nectar), plus more to taste
    • 2 tsp. corn starch dissolved in 4 Tbsp. water
    • 1 red chili, minced

    Start by making the stir-fry sauce. Place all ingredients - except garlic and cornstarch - in a sauce pan over medium-high heat.
    1. When sauce begins to bubble, reduce heat to medium-low. Now add the minced garlic and cornstarch (dissolved in water). Stir until the sauce thickens slightly - about 30 seconds to 1 minute.
    2. Do a taste test. You're looking for a balance of salty (fish sauce), spicy (garlic and chili), sour (lime), and sweet (sugar). Adjust these flavors to suit your taste.
    3. Place a little oil in a wok/frying pan over medium to high heat. Add the carrots and mushrooms.
    4. When the wok/pan becomes dry, add a little of the wine or sherry, 1 Tbsp. at a time, to keep ingredients frying nicely. Stir-fry in this way, adding more wine or sherry as needed, for 2-3 minutes, or until carrots start to soften.
    5. Add the rest of the vegetables plus 1/3 of the stir-fry sauce and continue stir-frying another 2 minutes, or until the broccoli has softened but still retains some of its crispness.

    Tuesday, April 5, 2011

    Chili Taco Tuesday

    Slow Cooker

    Turkey Butternut Squash Chili


    Yes, I know not your traditional tacos, but I will roll with it. Why not chili in taco shells. Sounds great to me. I have seen chili in burritos and even spaghetti in Tacos, so chili has it all, beans, meat, salsa, tomatoes. I am adding a Mexican twist to this chili, maybe it will make me feel more like a taco. Wait a minute, how can I be a taco?  The Mexican twist comes from the use of refried beans, salsa, and a little lime juice.  If you like chili and Mexican flavors, you’re sure to like this too. Another secret to my chili is the addition of butternut squash. It add a sweet, mellow creaminess, that you will love. Plus my kids will eat it, so it's a hidden vegetable bonus....
    In my family chili is a stew that is enjoyed year round.  Most soups and stews we like to reserve for cold weather, but chili seems to be just as popular and tasty in summer as it is in winter.  I think we will enjoy this variation year round also.

    Remember to always read labels and make sure the ingredients you are using are gluten free.


    • 2 lbs. ground meat (I used lean ground turkey)
    • 1 medium red onion, chopped
    • 1 small butternut squash, peeled, seeded and diced
    • 16 oz. thick and chunky salsa, choose mild, medium or hot
    • 1 can small red beans or chili beans
    • 1 can refried beans
    • 3/4 c. broth (I used Herb Ox bouillon vegetable flavor labeled gluten free and no added MSG)
    • 3 tsp. dried ground cumin
    • 2 1/2 Tb. chili powder
    • 2 Tb. lime juice
    • Tortilla chips

    Cook and drain the ground meat.  While the meat is cooking, chop the onion and prepare the butternut squash and drain and rinse the small red beans.
    Combine all ingredients except the lime juice in a large slow cooker.  Cook on low about 4 – 6 hours.  Stir in the lime juice.  Serve with hard taco shells or soft corn tortillas. Add your favorite garnishes, shredded cheese, chopped onion, chopped tomato, avocado, sour cream, jalapenos....
    A nice green salad or cole slaw goes great on the side.

    Monday, March 28, 2011

    Another Meatless Monday brings us Broccoli Cheese Soup

    As spring arrives and there is still a slight chill in the air, I decide to do a Meatless Monday Soup Dinner. I love soup for dinner, especially hearty soups. What better than a Creamy Broccoli Cheese Soup, thinking back to the days them I would get it at one of my favorite restaurants. Now being Gluten free and not having the option to go out and have my Broccoli Cheese Soup, I recreated this recipe to make it at home Gluten Free. Boy, is it yummy. This is a thick, rich delicious soup that the entire family will love. I suggest doubling the recipe.


    1 tablespoon butter, melted
    1/2 medium onion, chopped
    1/4 cup melted butter
    1/4 cup Potato Starch/Flour or Rice Flour

    2 cups half-and-half
    2 cups vegetable Stock

    1/2 pound fresh broccoli
    1 cup carrots, julienned
    salt and pepper, to taste
    1/4 teaspoon nutmeg
    8 ounces grated sharp cheddar cheese


    Directions:

    Saute onion in butter. Set aside. Cook melted butter and Potato flour using a whisk over medium heat for 3-5 minutes. Stir constantly and slowly add the half-and-half (this is called making a roux). Add the vegetable stock whisking all the time. Simmer for 20 minutes.

    Add the broccoli, carrots and onions. Cook over low heat until the veggies are tender for 20-25 minutes. Add salt and pepper. The soup should be thickened by now. Pour in batches into blender and puree. Return to pot over low heat and add the grated cheese; stir until well blended. Stir in the nutmeg and serve.

    Saturday, March 26, 2011

    Swedish Meatballs

    In the need for some comfort food, yup, that's what I need. Something to warm my soul and fill my stomach. Being that I am half Swedish, and first generation American, alot of my comfort foods are Swedish. One of my all time favorites is Swedish meatballs. This is a recipe that my Mormor (my maternal grandmother) made with a mild variation and that is the meat. I am not a fan of ground beef, in any form. Can't do it. So I substitute ground turkey for everything that calls for ground beef. Traditionally Swedish Meatballs also contain pork, but I opt. to just use ground turkey and they are so delicious and healthier, which is a bonus. If you search the Internet for Swedish Meatballs you will find many variations, many contain, beef, pork, bread, milk, sometimes mashed potatoes, nutmeg, etc.... This is not how my Mormor made them. My Mamma says that the reason for the bread and or potatoes are simply fillers to make the meat so further. My meatballs are simple, you get the flavor of the meat, not the fillers. I serve my meatballs with a brown gravy which is made with milk, lingonberries, http://en.wikipedia.org/wiki/Lingonberry_jam (think a variety of cranberries, yet better), and mashed potatoes.

    1 1/2 lbs lean ground turkey
    1 egg, beaten
    1/2 finely chopped onion
    1/4 cup GF bread crumbs
    salt and pepper to taste

    In a medium bowl, combine all ingredients. Mix well. Form into uniform meatballs, think smaller meatballs, not your spaghetti and meatballs size. In a large skillet over medium high heat, melt 2 tlbs. butter. Brown the meatballs, turning to prevent burning. Once brown reduce heat to medium low and cook until done.

    Brown Gravy

    2 1/2 Tbs. Rice Flour
    4 Tbs. Butter or margarine
    1 C. milk or soy milk
    1/2 cup water
    1 tsp. Kitchen Bouquet Browning Sauce
    1/2 tsp. sugar
    white pepper and salt to taste

    In a small sauce pan over medium high heat, melt butter. Once melted, whisk in the rice flour. Stir well, about 1 minute. While whisking  slowly add the milk and water. Stir until smooth, Add the Kitchen Bouquet, sugar, salt and white pepper. Simmer for about 3 minutes. Serve